imzoe.me blog shop
How to root your Snapmaker 2.0
Dec. 04, 2025
I wrote a post about rooting the Snapmaker 2.0 handset, but didn't describe the process you should use to do the same. This post will be a guide on how to do it, but it will assume you have the SnapBreaker USB jig that I sell on my store as well as a PC. You don't need the USB jig, but it definitely makes it easier and has other features to help you out. I'm a little biased, but I think it's great (just like everything else in the shop :^) ).
Step zero - Important Links
EDL loader file for the Snapmaker 2.0 touchscreen (HMI.firehose.mbn)
Magisk-v23.0.apk (newer versions won't work!)
Useful resource, worth bookmarking!
Step one - Developer Options
First, you need to get into Android's settings and enable developer options. nweolu on the Snapmaker forums has described how to get out of the default home screen, but tl;dr: plug in a USB keyboard into the controller's USB A port and enter WIN+N to open the quick settings menu. Pull it down, open the settings app and scroll down to "About device". Spam tap the "Build number" until it says you are now a developer. Tap the hamburger menu in the top left corner and scroll to developer options and open it.
Step two - Android Debug Bridge
Next, we will need to enable communication between the touchscreen and a PC. In developer options, scroll down to "USB debugging" and enable it. Scroll down to "OEM Unlocking" and make sure that is enabled too. Then scroll to "Default USB configuration" and set it to MTP.
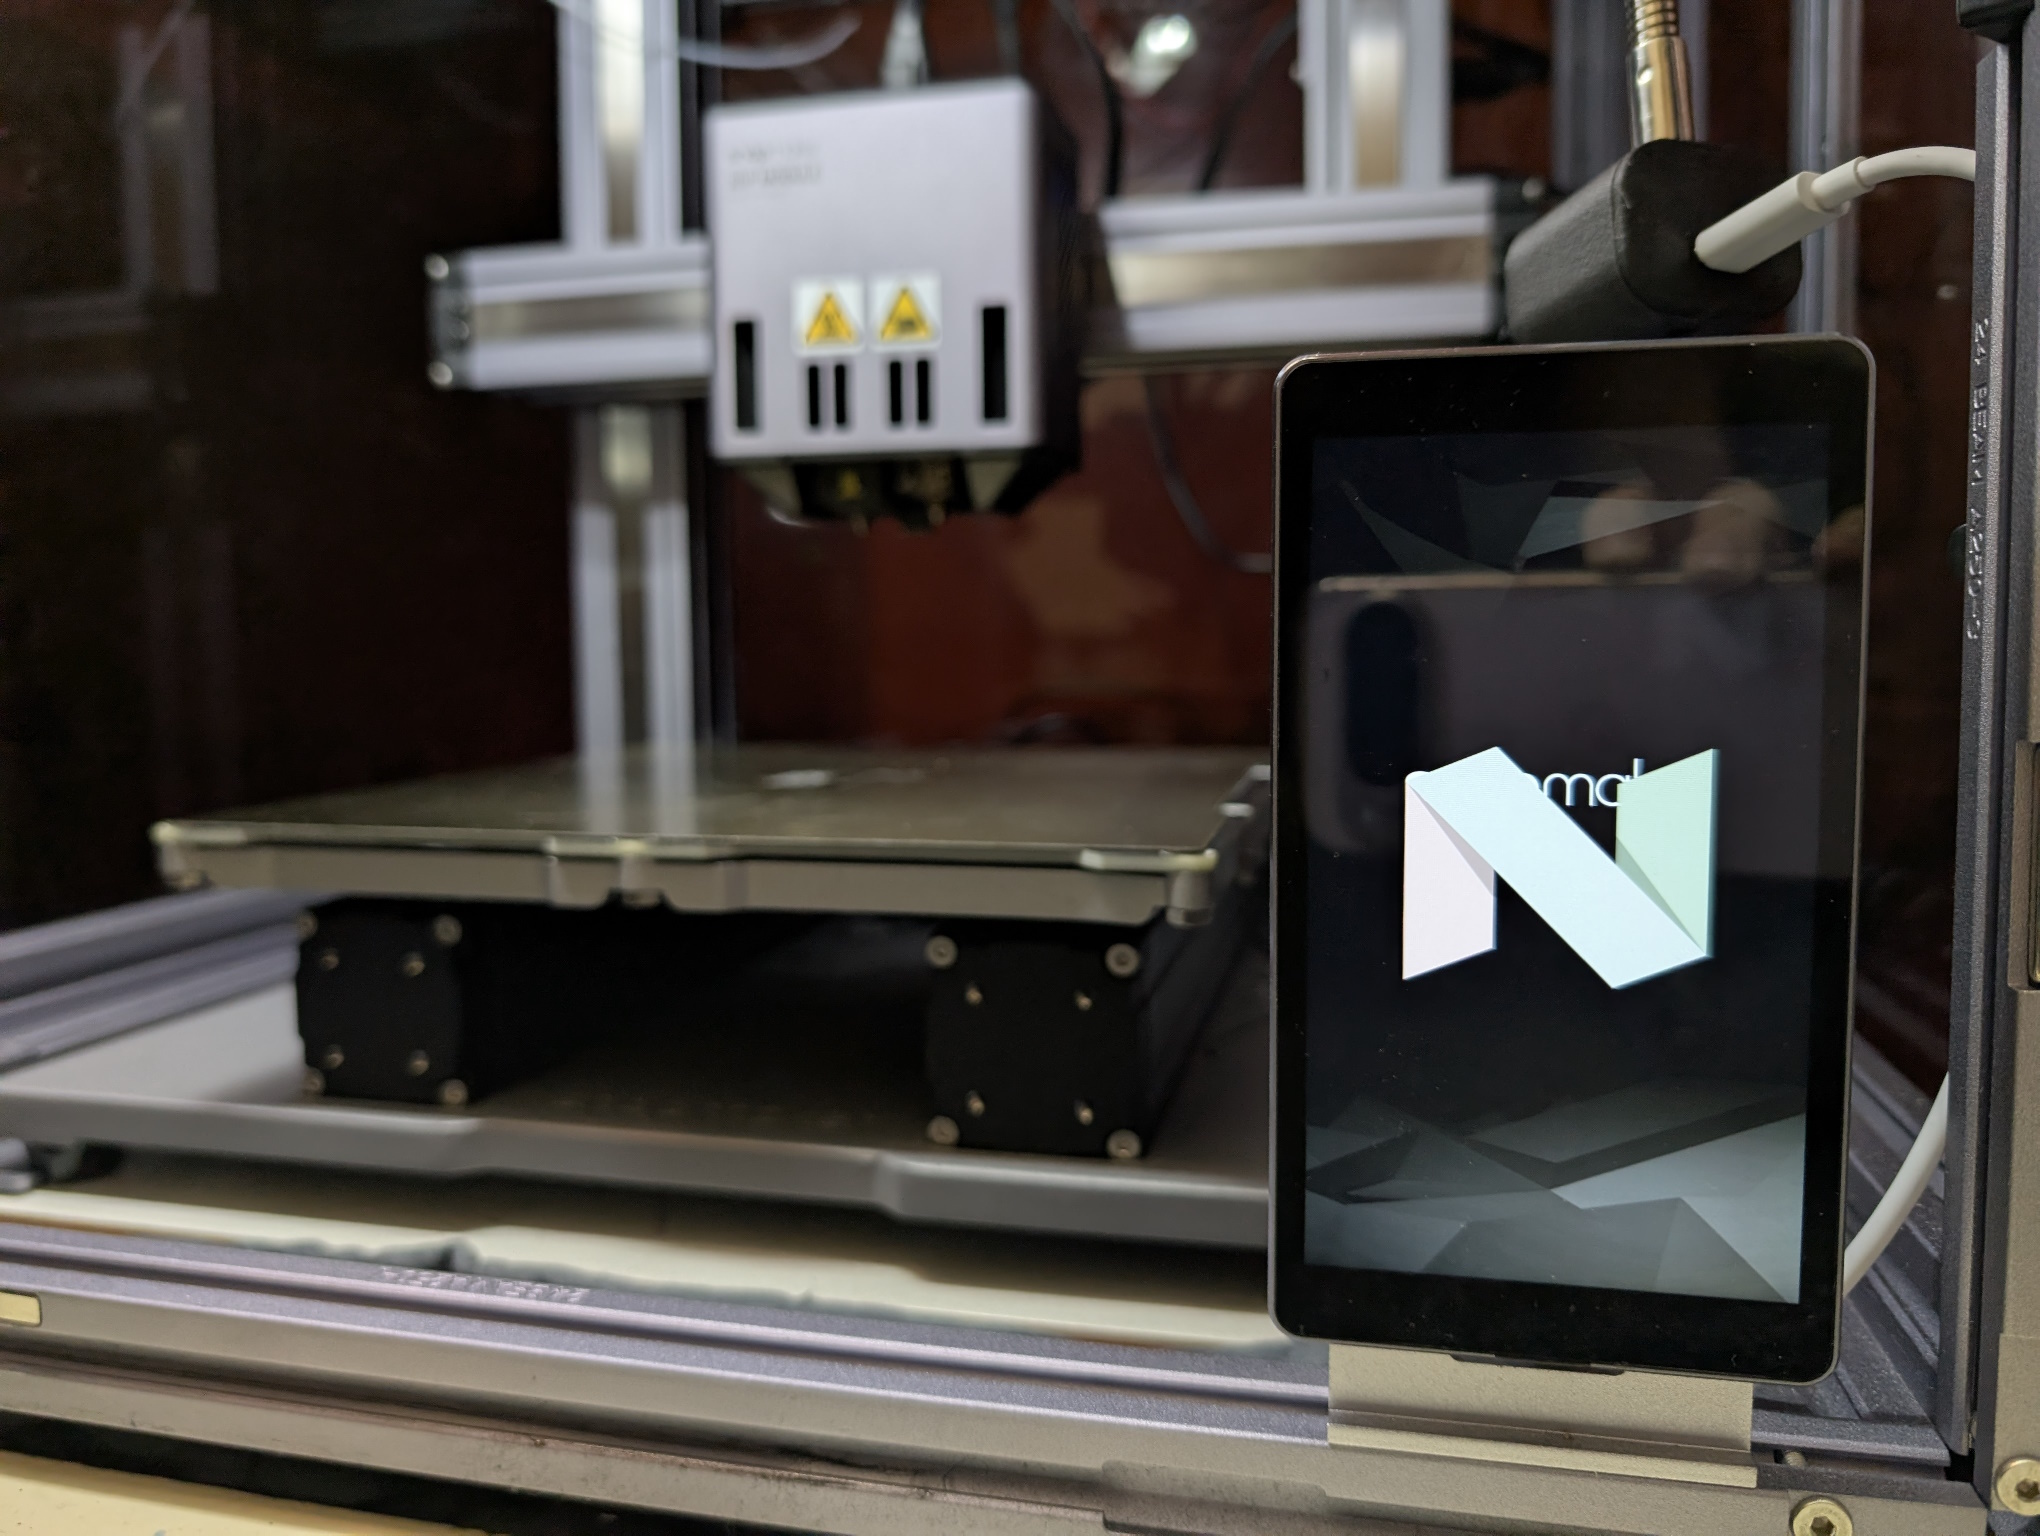
At this point, we will need to connect the touchscreen to a PC. Connect it to the USB jig, and then the USB jig to a PC. Make sure the switch on it is set to the OFF position and once the touchscreen has gone from the S logo to the Snapmaker text, set it to ON. If you don't have the jig, you can achieve this by connecting the USB data lines, USB 5V (not VBUS!) and ground to your PC and shorting USB ID on the USB-C to 5V a few seconds after the touchscreen has gone from the S logo to the Snapmaker text. If it stays stuck on the S logo, you're doing it wrong! Flip the switch to the opposite state of whatever it is currently in, unplug and retry.
On your PC, you will need to have ADB on your PC. You can get it as part of the Android SDK Platform Tools linked in the first section. Alternatively, there is an unofficial installer that will install it systemwide here.
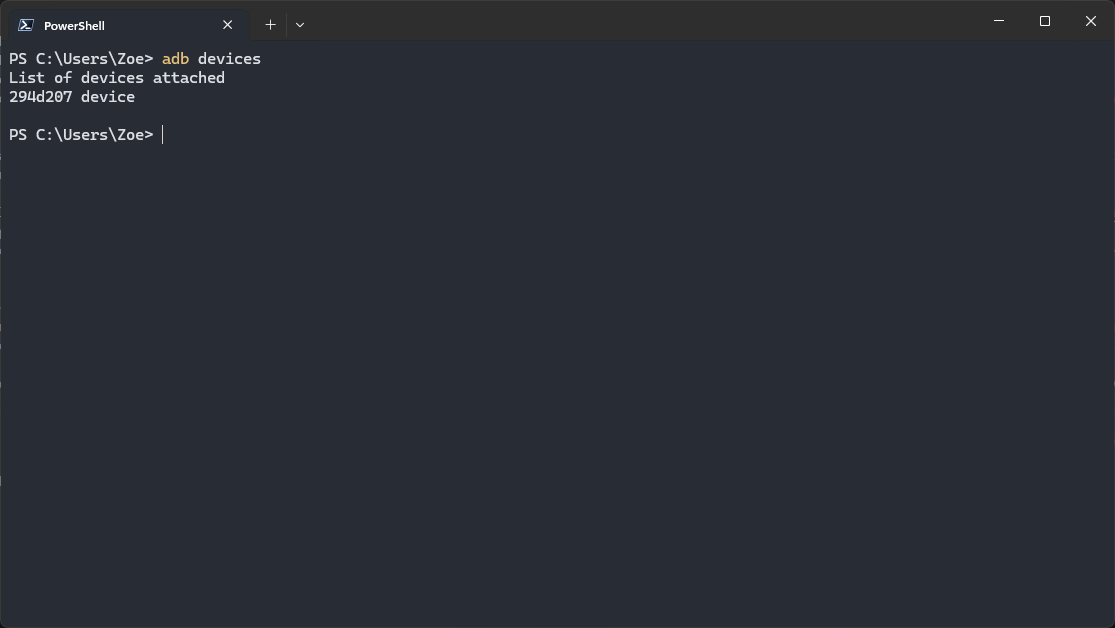
Once you have it installed, open a terminal/command prompt in the platform-tools folder (on Windows, shift+right click in the folder to get an option to open CMD/PowerShell/Terminal in that folder, assuming you don't have adb on your path already) and run the command adb devices.
You should see a device listed as unauthorized. On the touchscreen, you should see a prompt asking you to allow USB debugging. Allow it and run the command again. You should now see the device listed as authorized.
ADB can be a powerful tool, and it is extremely useful outside of this guide too. If you want to learn more about it, check out the official documentation.
One thing that is particularly useful is being able to send navigation keyevents so you can nagivate the UI despite not having software or hardware buttons.
You can do this with the command adb shell input keyevent <keycode>. E.g., to go back one screen, use adb shell input keyevent KEYCODE_BACK. A list of keycodes can be found here.
Step three - EDL mode
EDL (Emergency DownLoad) mode is a low level feature of Qualcomm SoCs used for unbricking phones. Here, we will use it to make a full backup in case of fuck ups and flash a patched boot partition.
It is important to note it has a timeout/lockout feature where if you enter a command that fails or you wait too long to send a command (15 seconds, I think?) it will fail to work and you will have to reboot it and re-enter EDL. To exit EDL, just unplug the handset and plug it back in. Remember the USB switch needs to be reset!
For this, your PC will need the unofficial edl package installed and set up on your PC. It's finnicky on Windows, but if you follow the automatic PowerShell instructions in the GitHub readme you should be ok.
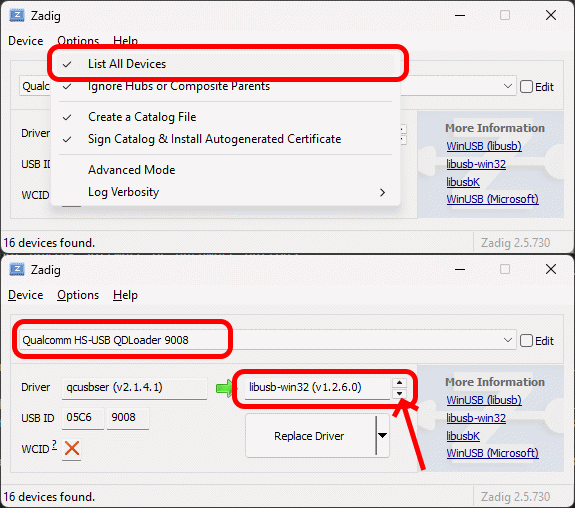
Once set up, run edl printgpt --loader=C:\Path\to\your\HMI.firehose.mbn replacing the loader path with wherever it is you've saved it. You can drag and drop it into the command window to autocomplete the path. If you get a NotImplementedError, you need to install USBDK and Zadig
plus you need to install the libusb_win32 driver from Zadig. Open Zadig, go to Options > List all devices, select the 9008 device from the list and replace the driver with the libusb-win32 driver by cycling through the replacement drivers with the little arrow buttons. Then click Replace Driver.
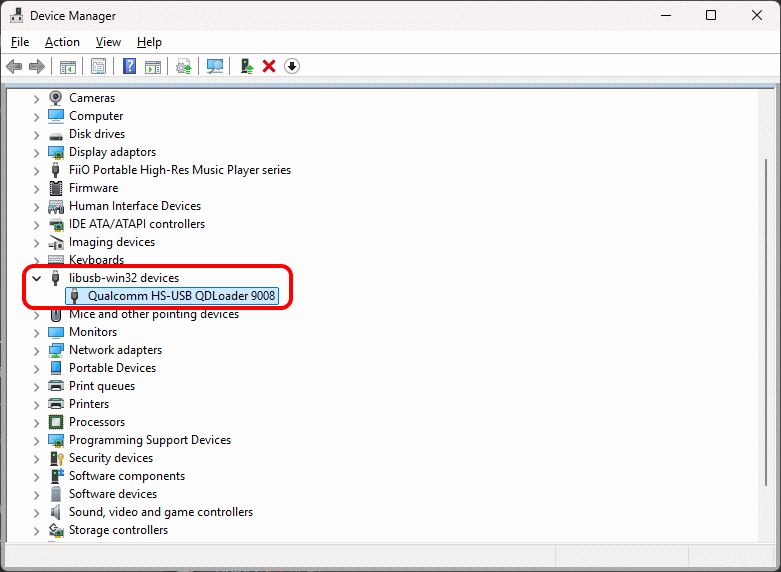
Once it has been installed, run adb reboot edl and it should reboot to a black screen. In Windows device manager, you should see a device called QDLoader 9008 (or something along those lines) appear under a COM port. If not, you may have to manually tell Windows to use the right driver by right clicking the device that corresponds to it
and selecting the correct driver.
You may need to reboot your PC after doing all that to refresh things. Once you have the device showing up properly, run edl printgpt --loader=C:\Path\to\your\HMI.firehose.mbn again and it should print out the partition table (assuming it didn't work perfectly before. being realistic, it probably didn't, lol).
Step four - actually rooting the thing
It's a great time to make a full backup now! It may take a while, but it's necessary since we need to patch the boot partition.
Run edl rl "C:\Path\To\Backup\Folder" --loader="C:\Path\to\your\HMI.firehose.mbn" --genxml to dump everything. You can append --skip=userdata to skip the user data partition.
Go to your backup folder, copy boot.bin and rename the copy to boot.img. Then, on the touchscreen, install Magisk Manager v23.0 (linked at the top, newer versions won't work!) with adb install "C:\Path\to\your\magisk.apk" and open it. Select Install > Select and Patch a File, then select the boot.img file you just made a copy of. Don't check the AVB/DM verity box.
Magisk will patch it and save it to your Downloads folder as boot_patched.img and then copy that file back to your PC.
Now we'll flash the patched boot image. Run edl w boot "C:\Path\to\your\boot_patched.img" --loader="C:\Path\to\your\HMI.firehose.mbn" and do not unplug the touchscreen or you're fucked. Once it has finished successfully, just unplug the touchscreen and open up the Magisk Manager app to verify that it has been rooted.
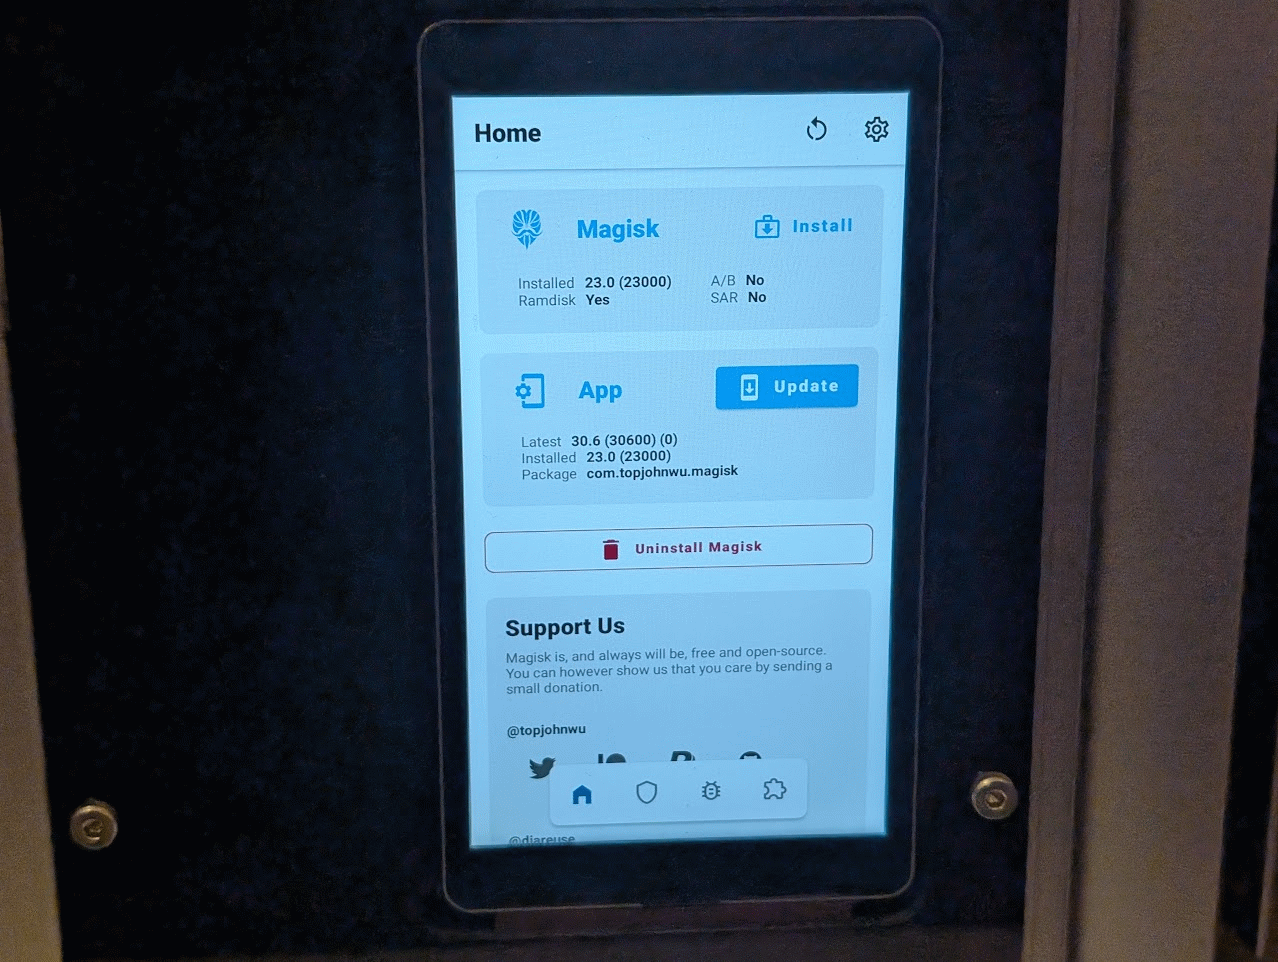
If you've made it this far, congrats! Your Snapmaker 2.0 touchscreen is properly rooted and you can do all kinds of silly things with it.